
260531
我们 02 已经完成了 ,接下来完成 03——边界探索。
首先,我们还是先完成一下我们的文档以及对应的实际代码:
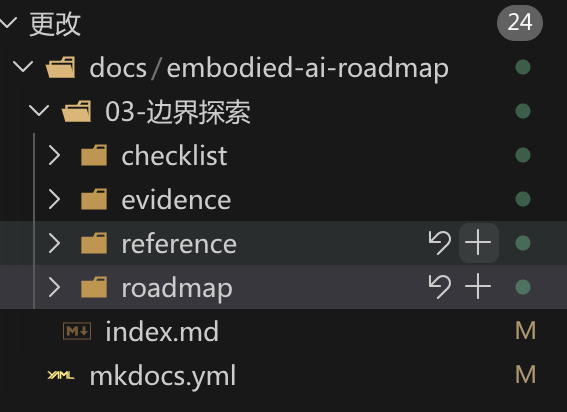
文档复测也通过了:

我们也是修改了好几茬 Skill 的,或许后续可以考虑重构一下这个 Skill,现在虽然可以跑通了,但是在文档内容上还是有不少的“补丁感”,而不是有书籍的感觉。
不过基本上已经够用了,我们开始正式写代码吧。
我们将新增一个 frontier_explorer的节点,它将订阅 /map 话题,用 map -> base_link 判断机器人当前的位置,然后从 OccpancyGrid 中提取未知区域和已知空闲区域的边界,将候选区域发送到 /navigate_to_pose ,并根据成功、失败拒绝或超时继续选择下一个 frontier。
我们先实现 OccupancyGrid 的建图算法,即 OccupancyGridMapping——占据栅格地图构建算法。。
OccupancyGrid 是 SLAM 建图保存的数据格式中的一种,通常来说,它会将地图切分为栅格,每个格子都用一个数字来表示该格子的情况。
在 ROS 中,比如 nav\_msgs/OccupancyGrid,通常就使用数字进行表示:
- -1: 未知
- 0: 空闲
- 100: 被占据
其中的中间数字,比如 30, 70 等就表示可能有障碍物。
我们可以用下面的视频来参考这个算法,这个算法的 HTML 也在我们的文档中的:
我们先创建 src/kibot_one_control/kibot_one_control/frontier_core.py,写入我们所需的数据结构:
from __future__ import annotations

from collections import deque
from dataclasses import dataclass
from typing import Iterable, Sequence

@dataclass(frozen=True)
class GridInfo:
    width: int
    height: int
    resolution: float
    origin_x: float
    origin_y: float

@dataclass(frozen=True)
class FrontierCandidate:
    key: str
    map_x: float
    map_y: float
    size: int
    distance: float
    score: float
然后我们先实现一下验证 Grid 是否有效的函数以及一些基础判断:
def _validate_grid(data: Sequence[int], info: GridInfo) -> None:
    if info.width <= 0 or info.height <= 0:
        raise ValueError("栅格的宽度和高度必须有效")
    if len(data) != info.width * info.height:
        raise ValueError("栅格数据长度不等于栅格长*宽")


def filter_cooldown_candidates(
    candidates: Iterable[FrontierCandidate],
    cooled_frontiers: Dict[str, float],
    now_seconds: float,
) -> List[FrontierCandidate]:
    return [
        candidate
        for candidate in candidates
        if cooled_frontiers.get(candidate.key, 0.0) <= now_seconds
    ]


def _is_unknown(value: int) -> bool:
    return value < 0


def _is_free(value: int, free_threshold: int) -> bool:
    return 0 <= value <= free_threshold
若输入的栅格数据有问题,在第一步就会抛出来错误,避免后续的步骤。
然后增加四邻域和八邻域的获取函数:
def _neighbor4(index: int, info: GridInfo) -> Iterable[int]:
    x = index % info.width
    y = index // info.width
    if x > 0:
        yield index - 1
    if x < info.width - 1:
        yield index + 1
    if y > 0:
        yield index - info.width
    if y < info.height - 1:
        yield index + info.width


def neighbor8(index, info: GridInfo) -> Iterable[int]:
    x = index % info.width
    y = index // info.width
    for dy in (-1, 0, 1):
        for dx in (-1, 0, 1):
            if dx == 0 and dy == 0:
                continue
            nx = x + dx
            ny = y + dy
            if  0 <= nx < info.width and 0 <= ny < info.height:
                yield ny * info.width + nx
这里四邻域和八邻域的求法值得单独拿出来说一下。
首先是四邻域。
我们的 x 和 y 是分别通过对宽度进行取模和整除的方式来获取到的。
这就要说到为什么了,假设我们的栅格的宽度为 5,比如下面这样:
(0, 0)(1, 0)(2, 0)(3, 0)(4, 0)
(0, 1)(1, 1)(2, 1)(3, 1)(4, 1)
(0, 2)(1, 2)(2, 2)(3, 2)(4, 2)
(0, 3)(1, 3)(2, 3)(3, 3)(4, 3)
将这个栅格进行平铺,对应的索引就是这样的:
(0, 0) (1, 0) (2, 0) (3, 0) (4, 0) (0, 1) (1, 1) (2, 1) (3, 1) (4, 1) (0, 2) (1, 2) (2, 2) (3, 2) (4, 2) (0, 3) (1, 3) (2, 3) (3, 3) (4, 3)
  00     01     02     03     04     05     06     07     08     09     10     11     12     13     14     15     16     17     18     19
可以看到,我们对应索引在二维栅格中的坐标。
比如我们想找到索引为 7 的坐标地址,可以先进行取模:
7 % 5 = 2,可以发现这对应了 x 坐标的值。
然后是 7 // 5=1,可以发现这对应了 y 坐标的值。
我们可以发现和我们预期的坐标值 (2, 1) 完全一致。
这就可以找到我们该栅格所在坐标。
然后就是四邻域了,四邻域指上下左右四个相邻的格子。
00 01 02 03 04
05 06 07 08 09
10 11 12 13 14
15 16 17 18 19
以我们这里的 07 为例,它上面的格子序号为 02,下面的为 12,左侧的为 06,右侧的为 07。
因此,上下左右这四邻域的索引就分别是:i - gird_info.width,i + grid_info.width,i - 1,i + 1。
然后通过上面的计算方式就可以反推出这几个邻域的坐标。
同理,我们的八邻域是指除了上下左右,还有左上、右上、左下、右下等几个邻域。
依旧以我们的 07 为例,左上为 01,右上为 03,左下为 11,右下为 13。
因此就可以通过下面的算法来得到具体的栅格索引:
nx = x + dx
ny = y + dy
if  0 <= nx < grid_info.width and 0 <= ny < grid_info.height:
    yield ny * info.width + nx
这部分就是有关四邻域和八邻域的内容。